Home automation for a connected house
By home automation, we mean all the techniques used to control and program, locally or remotely, electrical equipment and systems in a dwelling, business or building. The overall aim is to automate tasks by means of computer installations and to optimise the operation of electrical appliances according to predefined programmes or environmental measurements.
What is home automation in a house?
In concrete terms, a home automation system is used to automatically control various electrical appliances and systems such as blinds, doors and gates, electrical sockets, lighting, surveillance cameras or automatic watering systems. The domestic use of home automation simplifies the management of your electric or gas heating by adapting, thanks to a connected thermostat, the temperature in the living rooms according to your habits, controls the start-up of certain installations (alarms, audio systems) and even allows the start-up of certain electrical systems (household appliances such as the vacuum cleaner, coffee machine) since it can connect the sockets to the electrical installation. Systems can also be applied in companies to improve working conditions. The implementation of home automation solutions optimizes these different actions according to scenes programmed by the user (increasing the heating before the time of getting up or returning in the evening, for example) or according to what happens in the home, such as when the blinds are automatically lowered to limit overheating inside a room.Home automation and connected objects
While home automation solutions are based primarily on electricity, the advent of applications and smartphones has brought a new lease of life to the connected home. It is no longer just a question of controlling home automation devices and systems in the home, but also of remotely controlling them in real time and making them communicate and react. This is why it is sometimes referred to as Home Automation 2.0. The different functions of the home automation products can be independent or interconnected and the information, conveyed through an electrical installation, a wiring system, or wirelessly via radio waves or WIFI, circulates in both directions between the connected objects and the control interface. In parallel to the protocol programmed by the user, the sensors (thermometer, light detector, motion detector, smoke detector...) also communicate information to the computer system, which will either warn the user by means of a notification, or command the appropriate solution to the electrical systems (closing of doors, variation of light). This is why we speak of "smart house" or "smarthome", even if home automation is also intended for public places and companies.Aqara Vibration Detector Review
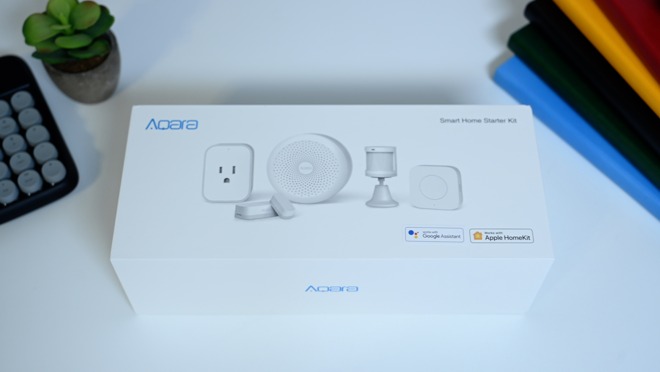
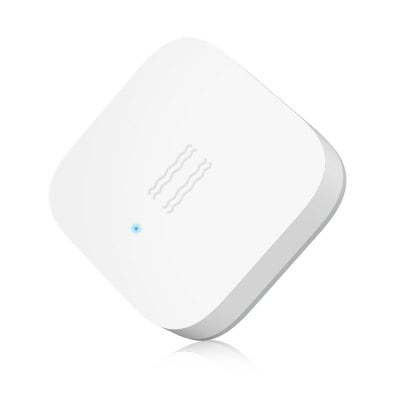
This is the third part of a small excursion into the world of the sensors I use in my house. Some readers asked, I answer. I now use an Aqara Hub and have thrown out a lot of stuff that hasn't proved so flexible for me in recent years. I use Aqara for the reason that most of the sensors and devices can be passed on to Apple HomeKit, there is also an Android app.But I described that a little bit more detailed in the first article. I'm very satisfied at the moment, because the complete equipping of the house was much cheaper than if I had used components from Devolo, Fibaro, Eve and what they're all called. The Aqara vibration detector is available for 10 dollars at various shops. It always fluctuates a bit. Like all devices, it is quickly connected to the hub, either via the app or by tapping three times on the hub and activating the search process via button on the vibration detector.

But it's really only a matter of 5 seconds, it doesn't take any longer. Although you can also automate in HomeKit, but the adjustment of the sensitivity is only possible via the Mi-Home app, also there nice rules can be created. Like the other sensors, the Aqara vibration detector is made of plastic. A replacement adhesive is also supplied to attach it. The battery used is a button cell, a CR2032.
What does such a sensor cost? That depends on where you order. I have shot mine myself for about 10 Euro per piece, ordered from Gearbest, whereby there are always actions - sometimes the sensors and switches are also cheaper at Aliexpress and Banggood. The Aqara sensors and switches can also be found on eBay and Amazon Germany, often more than twice as expensive, although they are also Chinese dealers.
Aqara Water Leak sensor
Is it possible to build a smart home system without a leak detector? As for me it will be at least a defective system. Who will be pleased to meet the evil neighbors from the lower floor, who will greet you with the phrase: "You drown us? "? Fortunately, the market is represented by a huge number of monitoring and alerting systems, but the prices for them vary greatly. If you have come to my site, you already know that there is a high-quality, and most importantly inexpensive system of automation from the company Xiaomi, which recently released the long-awaited sensor leak for Smart home, released under the brand Aqara.
Xiaomi Aqara Leak Sensor Overview
The sensor came in a standard, slightly crumpled, white box. The kit includes the sensor itself with a battery, box and instruction in Chinese.
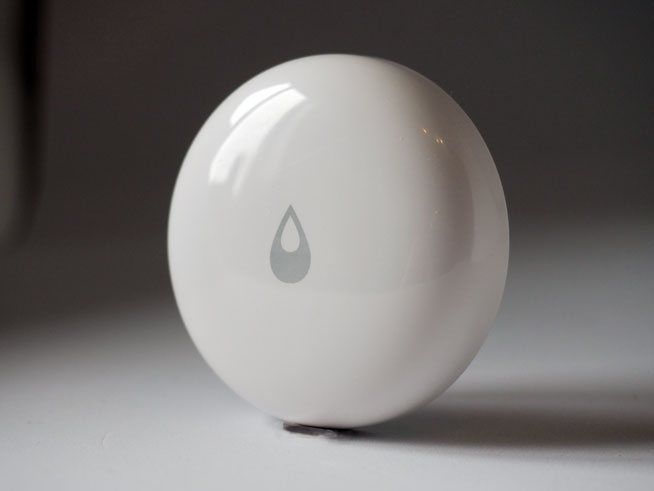
Externally, the sensor is similar to the wireless button Xaiomi, only made of glossy plastic and in the center of the device is depicted "droplet ". On the back of the gadget, we see two pins that define the leak, and the battery cover.
The device is powered by one battery CR2032. The battery is securely hidden behind the "screwed " lid, with a rubber gasket. It allows to achieve complete sealing of the device and provides its operation at full immersion in water.
The leak sensor housing is easy to open. Tightness of the casing provides a rubber gasket.
When you hit the water, the device confidently keeps afloat. For an hour spent in a glass of water, the water leak sensor never drowned.
Connecting the leak sensor in the Xiaomi Mi Home application
Do not forget that for the operation of the device requires a gateway that supports the ZigBee data transfer Protocol. Suitable Xiaomi Gateway 2 or Aqara Gateway 3.
To demonstrate the connection, I will use the Mi Home application and the plugin.
Adding a leak sensor is no different than adding other sensors, go to the application Mi Home and through the gateway, or from the main screen press "Add device ". Then press "Add manually " and find the icon of our sensor.
The instruction appears in the order of actions. Here everything is simple, in the center of the sensor, under the drop icon, there is a button, it should be pressed and hold for 5 seconds. The sensor then enters pairing mode and connects to the gateway. After adding, select the room in which the device is placed and set the name.
Xiaomi Aqara water leak sensor automation scenarios
To build scripts in the system, the leak sensor has 2 triggers: "flooding" and "dryly", they also give a start to the script. Ideally, at the moment of leak detection, the water supply should overlap.


